How to Take Hydrangea Cuttings – A Simple Step-by-Step Guide
Love your hydrangea and want more of it in your garden? Good news: hydrangeas are surprisingly easy to propagate from cuttings. With a few simple steps – and a bit of patience – you can grow brand-new plants for free. Ideal for filling empty spots in your garden, swapping with friends, or even giving as gifts.
In this guide, we’ll walk you through how to take hydrangea cuttings, the easy way – whether you’re inspired by Monty Don or just starting out.
When to Take Hydrangea Cuttings
The best time to take hydrangea cuttings is during summer – from June to late August – when the plant is full of energy and new growth. This is when cuttings are most likely to root successfully.
What You’ll Need
You don’t need a greenhouse or fancy tools to get started. Just gather a few basic supplies:
- A healthy hydrangea plant (preferably with non-flowering stems)
- A sharp, clean knife or pair of secateurs
- Cutting compost or general potting compost
- Small pots or a seed tray
- Rooting hormone powder (optional)
- A clear plastic bag or propagator lid
Step-by-Step: How to Take Hydrangea Cuttings
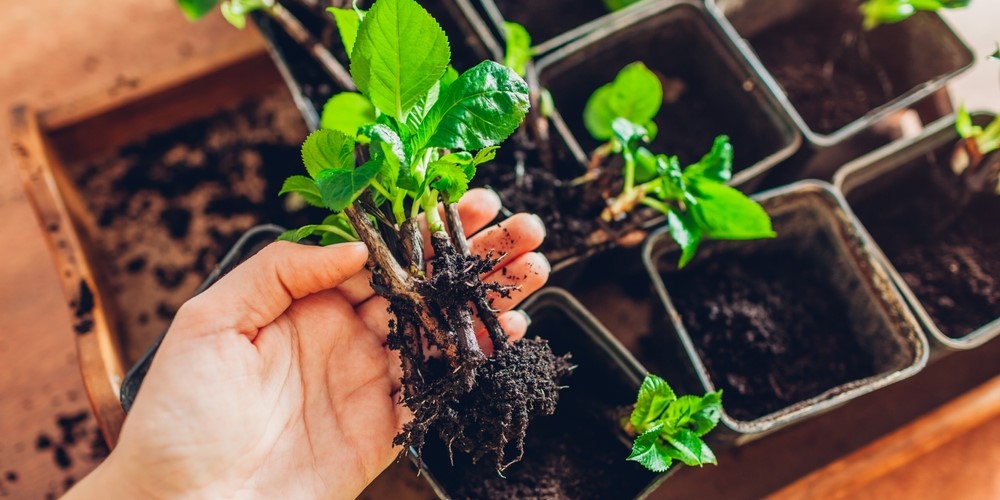
1. Select a strong stem
Choose a young, non-flowering shoot. Flowering stems are less likely to root well, as the plant puts its energy into the bloom rather than forming roots.
2. Make the cut
Using a sharp knife or secateurs, cut the stem just below a pair of leaves. Your cutting should be around 10–15 cm long. Strip off the lower leaves, leaving the top pair intact. If those top leaves are large, cut them in half to reduce water loss.
3. Dip in rooting powder (optional)
Dip the base of your cutting into rooting hormone powder. This isn’t essential, but it can encourage faster root growth.
4. Pot it up
Insert the cutting a few centimetres deep into moist compost. Firm the soil gently around the stem so it stays upright.
5. Create a mini greenhouse
Place the pots somewhere warm and bright – but not in direct sunlight. Cover with a clear plastic bag or a propagator lid to maintain humidity. Open it occasionally to let fresh air in and prevent mould.
6. Be patient
Roots usually form within 2 to 4 weeks. You can gently tug the cutting to check – if there’s resistance, roots have likely started growing.
What’s Next?
Once your cuttings have rooted, you can move them into bigger pots or plant them out in the garden. Just make sure to water them regularly, especially during dry spells.
For more general tips on taking cuttings from other plants, check out our article: How to Grow New Plants from Cuttings
Common Mistakes When Taking Hydrangea Cuttings
❌ Using flowering stems
These take too much energy and usually won’t root well.
❌ Leaving them in full sun
Direct sunlight can dry out young cuttings. A bright but sheltered spot is ideal.
❌ Skipping the humidity
Without a moist environment, your cuttings may wilt or dry out. A plastic cover helps create the humidity they need to thrive.
Grow Your Own with Confidence
Taking hydrangea cuttings is one of the easiest – and most satisfying – ways to grow your garden. Whether you’re a fan of how to take hydrangea cuttings Monty Don-style or just dipping your toe into gardening, this is a great place to start.
There’s something incredibly rewarding about watching a tiny cutting turn into a flourishing shrub – one you’ve grown with your own hands. Go on, give it a try!